


Virtual keyboard (touch keyboard) is a useful feature that many Windows users use on a daily basis. However, not everyone knows that the size of the virtual keyboard on the screen can be adjusted flexibly.
If you’re using the virtual keyboard on Windows 11 and want to adjust the size, here’s how.
First, open the Windows Settings application by pressing the Windows + i key combination. Or you can also right-click the Start button on the taskbar and select “Settings” from the pop-up menu.

When the Settings window opens, click on “Personalization”, then select “Touch Keyboard”.

On the virtual keyboard settings interface, you use the slider labeled “Keyboard Size” to adjust the size of the on-screen virtual keyboard according to your needs. The default size is “100“.
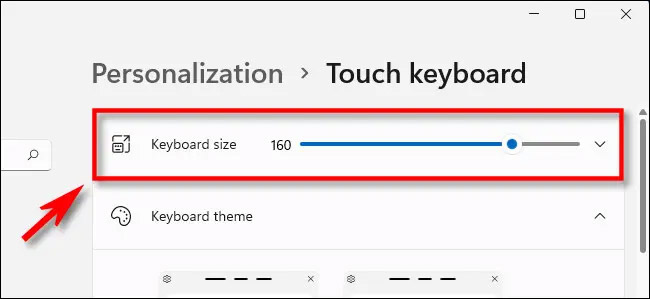
After each adjustment, use the touch pad icon on your taskbar to display and check the specific size. Or you can click on the “Open Keyboard” item located just below the slider in Settings to check the size of the keyboard after changing.
At maximum settings, this slider can let you set up a really large virtual keyboard that takes up almost half of the screen. Thereby allowing easier data entry on small screens.

Conversely, at minimal settings, the keyboard can be scaled down to the point of being almost unusable. This is useful when you are performing a task that needs to “hide” the keyboard.

Wish you have a good experience with the virtual keyboard of Windows 11!
